")
I have long been impressed by those immaculately iced biscuits (cookies to our American friends) that you see on Pinterest and in fancy stores, so I thought I’d have a go and see if I could make some.
I then stumbled across a book by the biscuit geniuses at Biscuiteers in Nymans National Trust second hand bookshop. And it seemed like fate.
So one Saturday, my daughter and I donned our aprons and made the vanilla biscuit recipe from the biscuiteers book (it’s also online here). Except we replaced most of the syrup with honey because we didn’t have much syrup. Not sure it made any difference – you couldn’t taste the honey, and the texture was great.
We split it in two, and rolled it out between two pieces of parchment paper. To about 5mm thick.

We used a random assortment of cutters (obviously mini-me insisted we had to include a unicorn!)

This batch came out just right. The second batch were a little darker. Just as tasty, but a slightly different flavour.
They didn’t take long to cool, and we popped them in a Tupperware container overnight, ready to ice the following day.
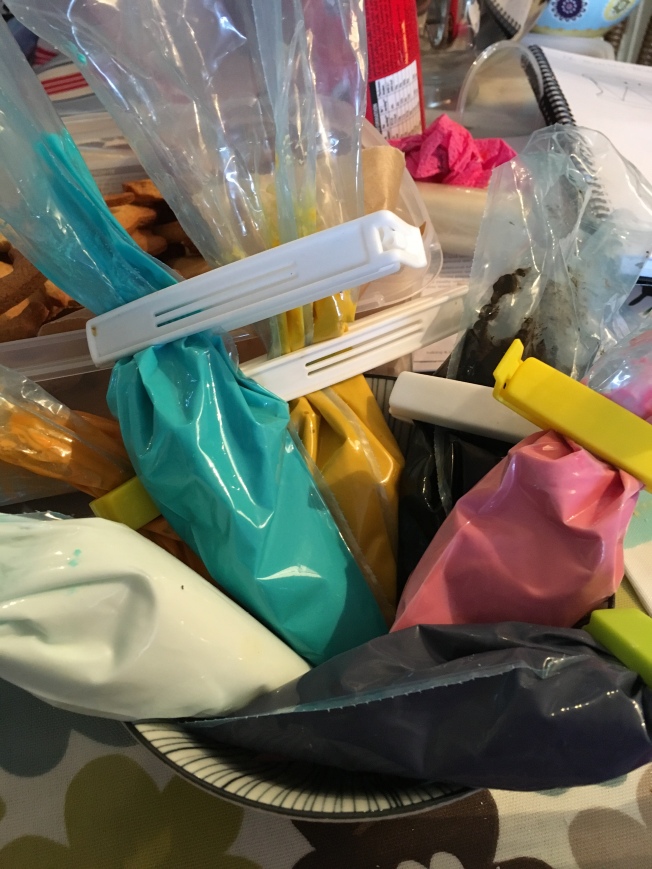
We used the biscuiteers royal icing recipe (see here), made with fresh egg whites. My trusty KitchenAid made short work of whipping up a batch, which we then watered down slightly and added a variety of Wilton food colouring gels. We also added some gold lustre dust to some golden yellow icing, which gave it a lovely subtle sheen.
To make the black icing we added cocoa powder to the icing to darken it, before adding black food colouring. It worked really well.
A top tip is to stick some clingfilm directly on top of your icing to keep it from drying whilst you aren’t using it.
There are two main types of icing when you are making biscuits. Line icing and flooding icing. Basically you make a border with the line icing, and flood it (fill the border) with the flooding icing. Line icing is also used for making patterns/detail on top after you have flooded the biscuit. The line icing is stiffer than the flooding one, but some people use the same icing to both outline and flood.
I tried making a mix of line icing, flooding icing, and something in between that could be used for both.
We popped the colours in icing bags, and some white flooding icing in a squeezy bottle, which I had bought online. It works really well, and I’d definitely recommend getting a couple.

You can see in the picture below the outline (which you leave for a few minutes to dry before flooding), and the flooding which hasn’t quite made it to the edge on the head.

Toothpicks are great for helping it spread a little. As is banging it gently on the table, or jiggling it quickly from side to side (yes really!). Though we did lose a few unicorn horns that way!
Leave the flooded biscuit for about 20 minutes to dry before adding decoration on top. Unless you’re doing some marbling, in which case do it straight away. I piped lines on it and then zigzagged through them to create the marble. Be careful not to add too many colours or overmix, otherwise you end up with a sludge colour (see the dress!).


And here are our results. Far from perfect, but I learnt a lot, and I’ve already got some ideas about what I would do differently next time.

I think this is my favourite…

The texture of the icing is absolutely key, and I’m a bit lazy, so am drawn to the idea of having the same texture icing for both outlining and flooding. A bit more experimenting required to get it just right. The teal and gold ones were the closest to this. The orange was too stiff to flood properly. I think if you wanted to do really fine decorating then you would need the line icing texture.
The size of hole I cut in the piping bag was also crucial. Some of them were a bit big.
And you really have to plan ahead in terms of which bits to outline in what colour, what to flood, what to add on top. We traced round the cutters and drew out designs to help us plan things out.
And my final top tip – we spread oilcloth on the table, and it was a great idea. Food colouring is a nightmare to remove!
I loved it, and I think I have developed a new obsession. I can’t wait to try again!
Related posts: Tiny Gingerbread Houses

Pingback: Tiny Gingerbread Houses | Holly's New Home
Pingback: Pride Rainbow Biscuits | Holly's New Home
Pingback: 40th and 50th Birthday Biscuits | Holly's New Home
Pingback: Jungle Biscuits | Holly's New Home